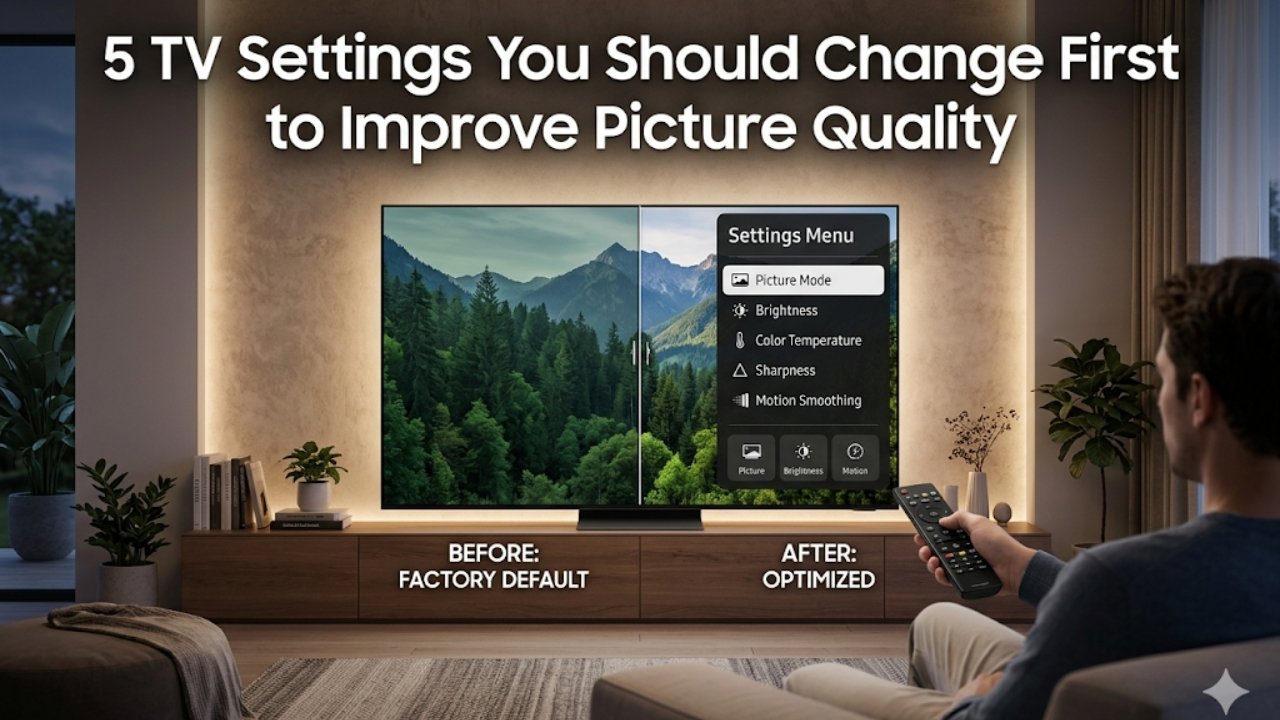
Every time it comes to unboxing a new television, one is immediately thrilled, and factory default, as is usually the case, will bring out flashy shows rather than provide a real home viewing experience. I have had years of practice building home theaters systems with friends and family and these five upgrades do not require more than ten seconds to upgrade your picture quality: whether it be a lowered end LEDs, or a super expensive OLEDs. I will use the practical experience with Samsung, LG, Sony, etc. and will go through the steps that can be implemented in practice to make your screen lively with natural colors and fine details.
Turn Off Energy Saving Mode
The majority of TVs are the ones with energy saving turned on to achieve efficiency. That ambiance bleaches the light and distorts the hues, overcasting the picture in a washed-out appearance. Off does not come across as its pictures do not give you the entire potential of the panel, particularly when sight is clouded by glare in sunny rooms. Turn off the energy saving in the picture settings menu, which is normally found in the system or general menu. You see that movies, such as ocean waves, sunsets, etc. get rich immediately.
Contrast is also dynamically restricted in this mode placing dark scenes in gray. When I had various models and and switched off it increased day time sports or news by up to 30 percent, making it into a sharp, vibrant experience. Adjust the change with a right kind of room lighting that will not strain your eye- your TV will reward you with better images.
Disable Motion Smoothing
Motion smoothing (SK) (also known as TruMotion on LGs or Auto Motion Plus on Samsungs) is the source of that soap-opera look with motion that does not seem natural. It is enabled in the stores by the manufacturers and it introduces extra frames which distort the original touch of the film. Switch it off to the high picture settings to get a purer 24 fps film appearance.
Film makers intentionally construct motion to immerse and going against it is as fast-forwarding a memory as possible. In the slow-moving blockbusters and the light-hearted sitcoms, I discovered that zero motion smoothing does not remove any emotional moment- explosions are not comical. In case of sports stutter, use low mode like Cinema or Filmmaker as the alternative to smoothing off completely.
Picture Mode Movie or Cinema Picture Switch.
Out of box Standard or Dynamic modes saturate up artificially, brightening skin-colour and producing halos. The default setting of the preset: Movie, Cinema or Filmmaker Mode (ULC Alliance-certified) lies in accordance with the industry standards such as Rec.709 or Dolby Vision, and it provides a moderately contrasted without gimmicks. It can be selected in the picture mode drop down.
These modes are imitators of a theater blank canvas. Similar to side-by-side comparisons that I have conducted, “Vivid mode made the lush forest appear like neon, whereas Movie mode displayed natural greens and shadow details. This leaves a good background in terms of additional improvements to be made, making your content come out in the way the director intended.
Light Setback and Brightness appropriately.
Back (or, on LGs, OLED) lights are used to regulate a general luminance; brightness is used to regulate black levels–labels may be confusing. When daytime watching, turn Back lighting down to 80100% to counter ambient light, and then turn brightness to 45550 so as to enhance shadows without losing detail. Check against a combination of dark scenes and bright trailers to tune in.
| Setting | Daytime (Bright Room) | Evening (Dim Room) | Why It Matters |
|---|---|---|---|
| Backlight | 90-100% | 60-80% | Maximizes punch against glare |
| Brightness | 50-60 | 40-50 | Preserves shadow detail |
| Contrast | 85-95 | 90-100 | Enhances depth without clipping |
I have some notes of calibration on 4K TV starting points, which have been summarized in this table. Excess backlight wastes and exposes OLEDs to burn-in, whereas the correct levels provide detail in the dark skies or leather that would have been invisible with excessive brightness. Minor conformities give disproportionate returns.
Adjust Fine Temperature to Heat up.
Whites appear sterile with blue-colored temperatures of coolness (~9300⁻ K) that reminds one of hospital light. This is preferred by factory defaults in connection to pop. Switch to Warm 1 or Warm 2 (where the video auto suite daylight, about 6500 K) in advanced picture options. This transformation produces organic skin complexions and sunshine. It is not very overpowering but it changes dramatically particularly when it fades off on the skin in plays or grass in natural series.
This combined with the tweaks above improves a professional level without any fancy tools. I have taken non-technical users through it, and they are always impressed at how real things appear on it, no more icy pallor. The trick about re-calibration is that when the room lights change between seasons, so do the TV and you have transformed the television into a narrator.
These updates require fewer than ten minutes to implement and on all devices, both the arrival-level Roku smart TV entries and top-notch minis. They avoid the deep widths of the calibration rabbit, but concern the 80/ 20 wins that you will find in real usage. Test them out in your room because there are no perfect preferences but to get any screen lifting, this is where your test begins.
FAQs
Q1: What is Filmmaker Mode?
A pre-recording that stops processing the picture to be able to remain how the director wanted. Available on most modern TVs.
Q2: Does this work on older TVs?
Yes. Basic features such as motion smoothing and backlight have been available in all models of the past 10 years, but the names of the menu settings might vary.
Q3: Will the modifications have an impact on smart features?
No. Picture settings are not dependant on either apps or streaming qualities.

